Android integration
Integration sample code
The integration sample code is available here https://github.com/finogeeks/mop-android-demo If you do not have access to Github in your environment, you can also visit the gitee mirror repository by clicking here.
1.Get applet credentials
To use the SDK you need to apply for the SDK KEY and the SDK SECRET. Only if the correct SDK KEY and SDK SECRET are configured during the initialisation of the SDK will it work.
1.1 Creating applications
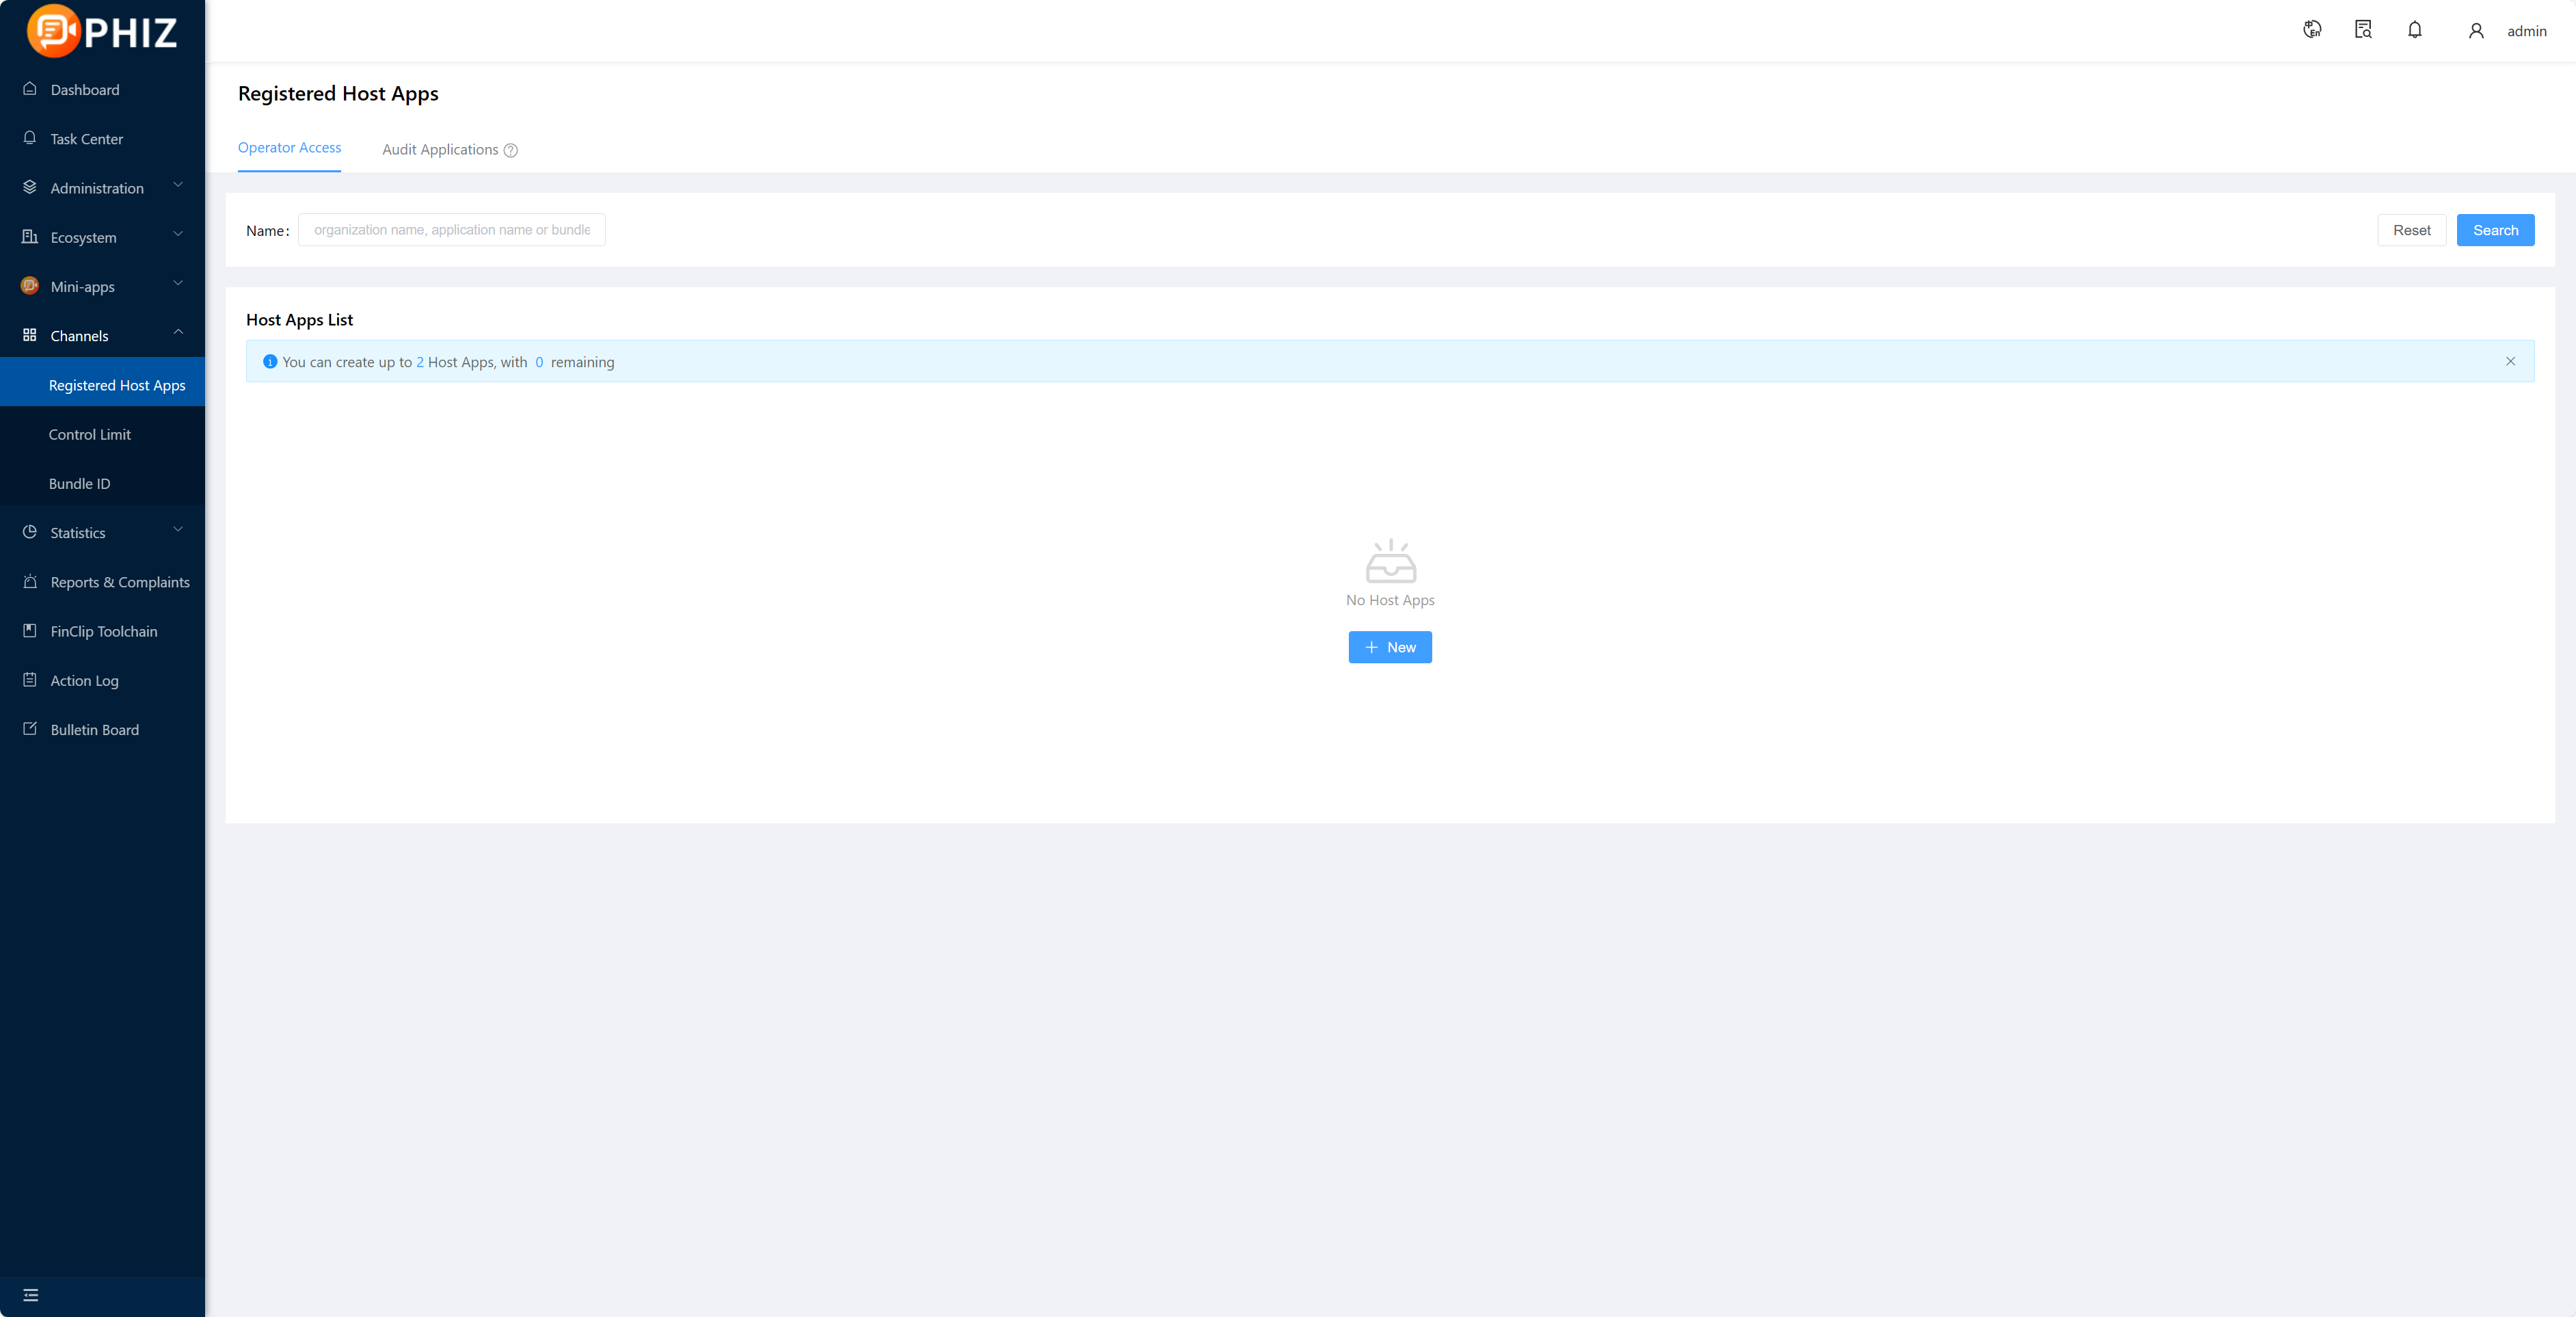
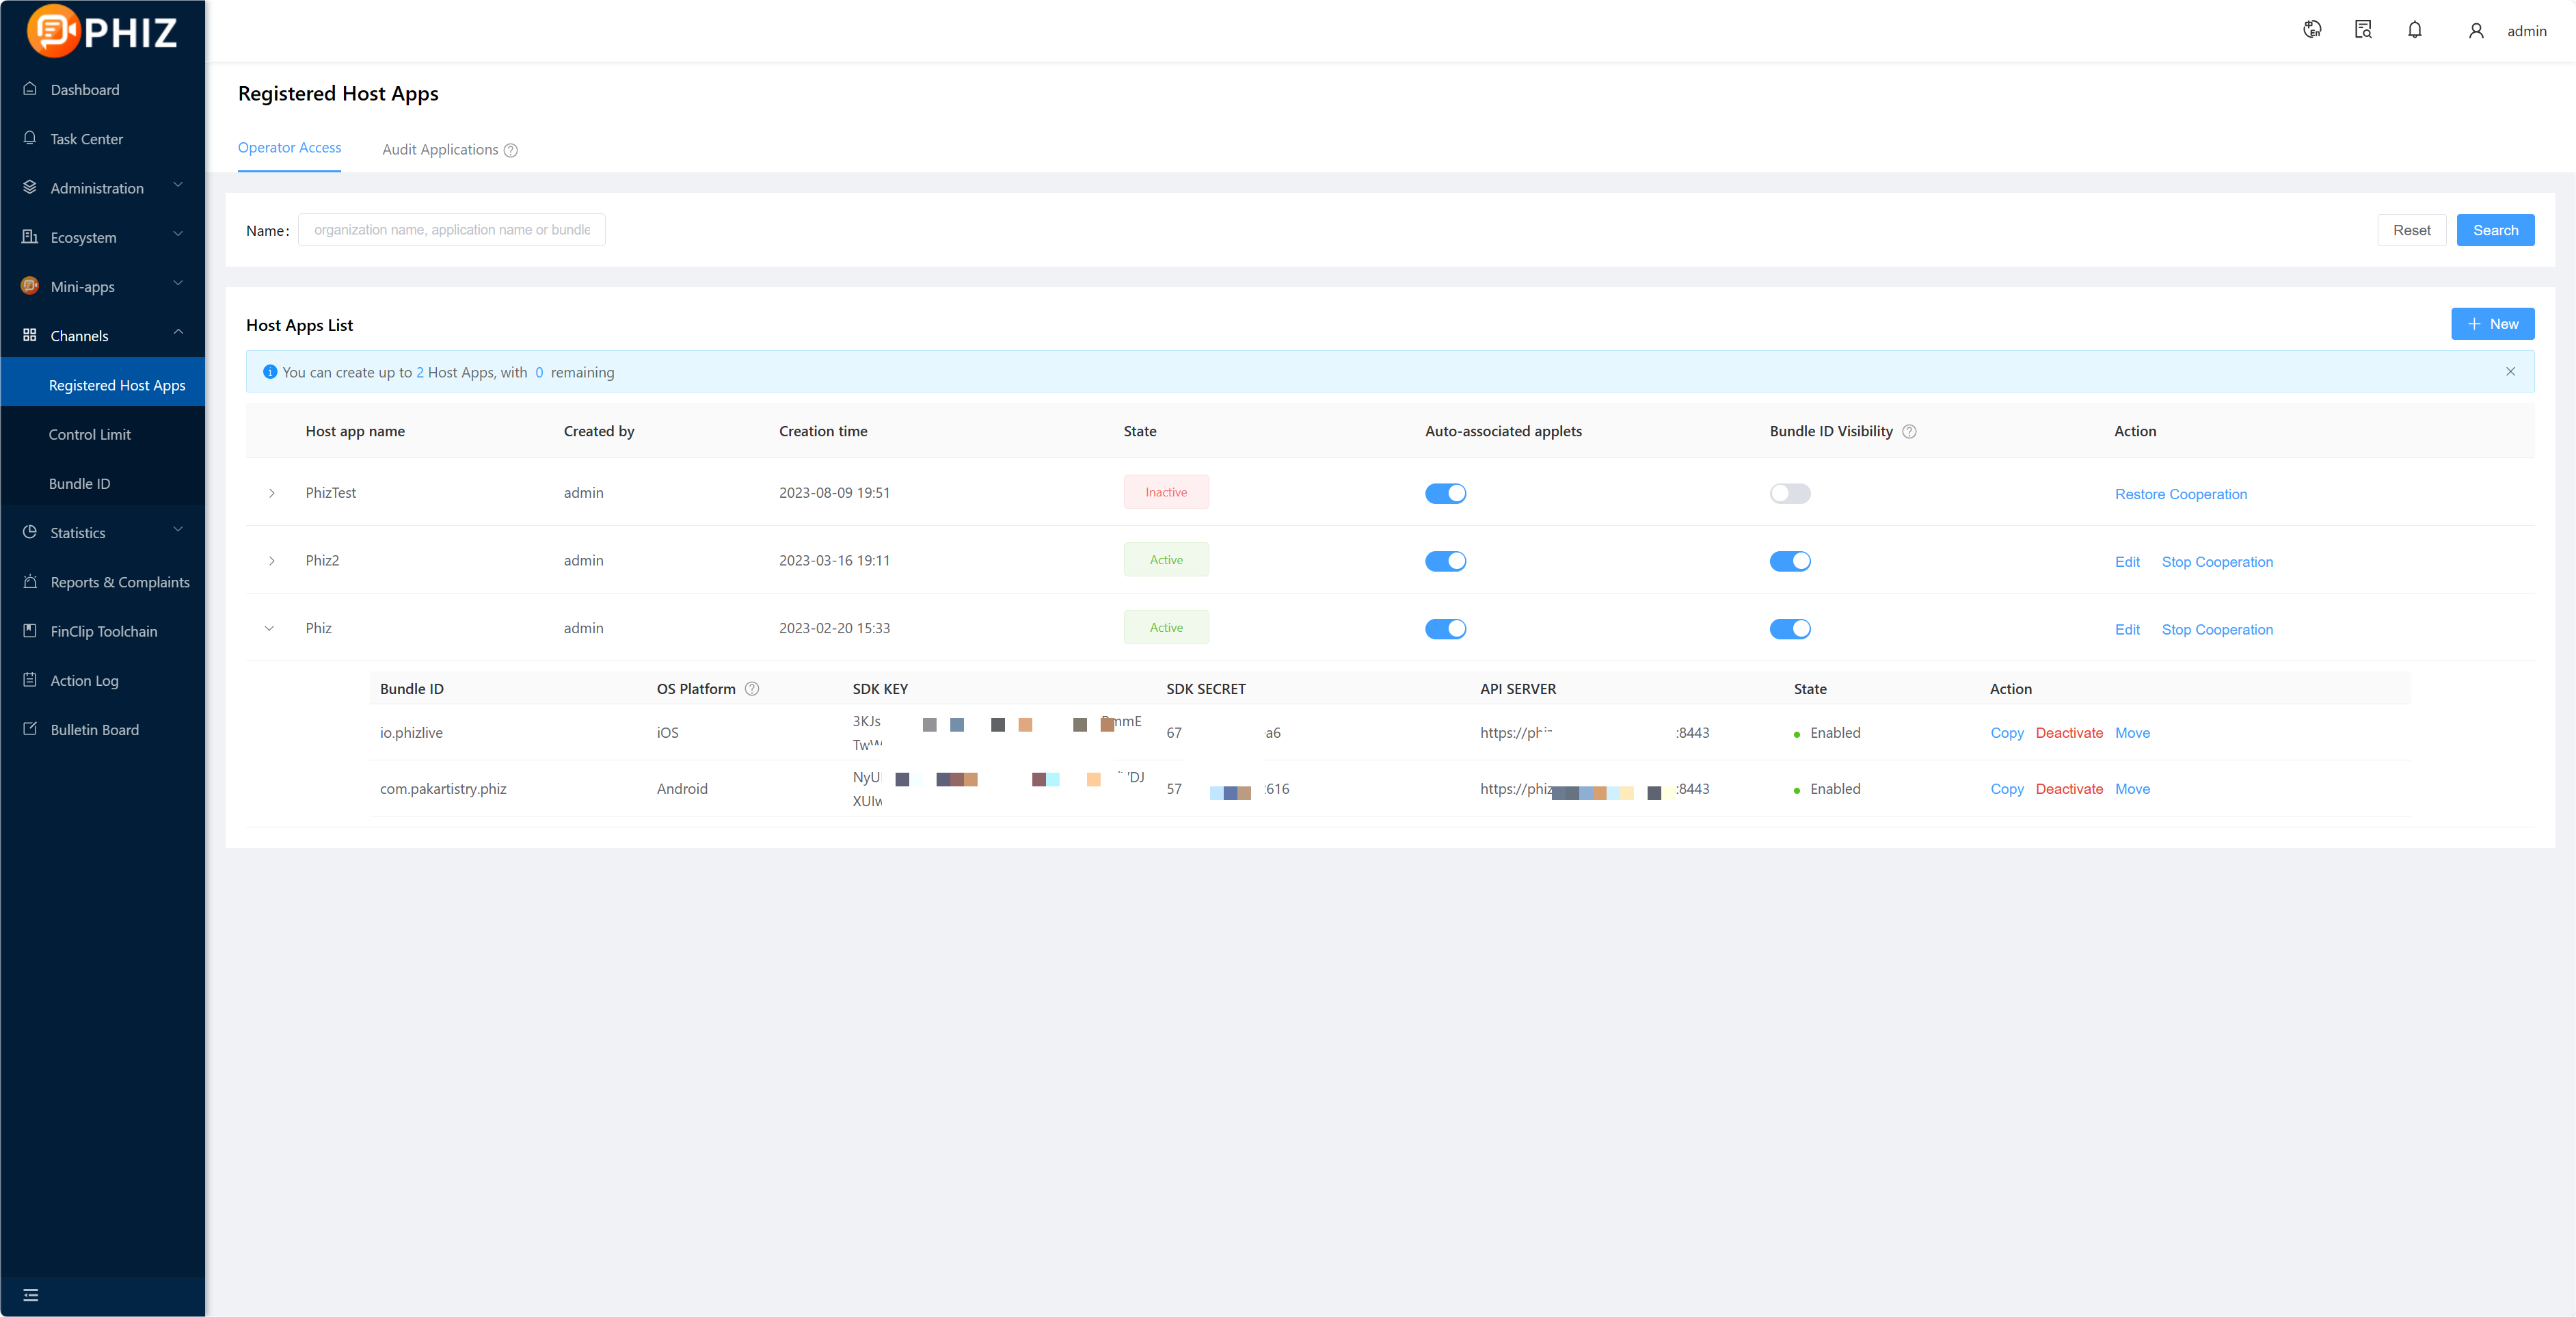
Registered users need to log in to "App Management - New Partner App" to complete app creation;
1.2 Obtaining SDK KEY and SDK SECRET
After creating the application and adding the Bundle ID, if you need to export the corresponding SDK KEY and SDK SECRET, please select "Copy" after the corresponding Bundle ID, you can paste it by Ctrl+V or Command+V;
 Subscribe to DeepL Pro to edit this document. Visit www.DeepL.com/profor more information. Of which.
- SDK KEY: This is the credential for the partner application to use the applet SDK.If the SDK KEY fails, all APIs of the SDK will not be available.
- SDK SECERT: is the security certificate for accessing the service, do not give it to third parties.
Tips
For details on creating applications and obtaining the SDK KEY and SDK SECRET, see the 「Introduction-Operation Guidelines-Enterprise Operation Guidelines-7.」 section.
2.Importing the SDK
2.1 What to configure in the project's build.gradle
Add the address of the maven repository to the project's build.gradle at
maven {
 url "https://gradle.finogeeks.club/repository/applet/"
 credentials {
 username "applet"
 password "123321"
 }
}
As some of the code in the SDK is written in Kotlin, it is necessary to add the gradle plugin for Kotlin to the project's build.gradle.
classpath "org.jetbrains.kotlin:kotlin-gradle-plugin:1.3.61"The full configuration of the project's build.gradle is as follows.
buildscript {
 repositories {
 google()
 jcenter()
 }
 dependencies {
 classpath "com.android.tools.build:gradle:3.5.2"
 classpath "org.jetbrains.kotlin:kotlin-gradle-plugin:1.3.61"
 }
}

allprojects {
 repositories {
 google()
 jcenter()
 maven {
 url "https://gradle.finogeeks.club/repository/applet/"
 credentials {
 username "applet"
 password "123321"
 }
 }
 }
}

task clean(type: Delete) {
 delete rootProject.buildDir
}
2.2 Dependencies on SDK in gradle
Add a dependency on finapplet in the dependencies of the gradle file.
implementation 'com.finogeeks.lib:finapplet:x.y.z' //x.y.z must be
replaced with the specific version number
Note
The dynamic libraries in the SDK are hardened.Hardened dynamic libraries cannot be compressed when compiling and packaging, otherwise an error will be reported when loading.
So you need to add a doNotStrip configuration to build.gradle under the App module.
packagingOptions {
 // libsdkcore.so, libfin-yuvutil.so are hardened and cannot be compressed, otherwise an error will be reported when loading dynamic libraries
 doNotStrip "*/x86/libsdkcore.so"
 doNotStrip "*/x86_64/libsdkcore.so"
 doNotStrip "*/armeabi/libsdkcore.so"
 doNotStrip "*/armeabi-v7a/libsdkcore.so"
 doNotStrip "*/arm64-v8a/libsdkcore.so"

 doNotStrip "*/x86/libfin-yuvutil.so"
 doNotStrip "*/x86_64/libfin-yuvutil.so"
 doNotStrip "*/armeabi/libfin-yuvutil.so"
 doNotStrip "*/armeabi-v7a/libfin-yuvutil.so"
 doNotStrip "*/arm64-v8a/libfin-yuvutil.so"
}
The complete configuration is as follows.
apply plugin: 'com.android.application'

android {
 buildToolsVersion '28.0.3'
 compileSdkVersion 28
 defaultConfig {
 applicationId "com.finogeeks.finappletdemo"
 minSdkVersion 19
 targetSdkVersion 28
 versionCode 1
 versionName "1.0"
 }
 buildTypes {
 release {
 minifyEnabled true
 proguardFiles getDefaultProguardFile('proguard-android.txt'), 'proguard-rules.pro'
 }
 }
 packagingOptions {
 // libsdkcore.so, libyuvutil.so are hardened and cannot be compressed, otherwise it will report an error when loading dynamic libraries
 doNotStrip "*/x86/libsdkcore.so"
 doNotStrip "*/x86_64/libsdkcore.so"
 doNotStrip "*/armeabi/libsdkcore.so"
 doNotStrip "*/armeabi-v7a/libsdkcore.so"
 doNotStrip "*/arm64-v8a/libsdkcore.so"
 doNotStrip "*/x86/libyuvutil.so"
 doNotStrip "*/x86_64/libyuvutil.so"
 doNotStrip "*/armeabi/libyuvutil.so"
 doNotStrip "*/armeabi-v7a/libyuvutil.so"
 doNotStrip "*/arm64-v8a/libyuvutil.so"
 }
}

dependencies {
 implementation fileTree(include: ['*.jar'], dir: 'libs')
 implementation 'com.finogeeks.lib:finapplet:x.y.z' //x.y.z must be replaced with the specific version number
}
2.3 Configuring obfuscation rules
After integrating the SDK, the following configuration needs to be added to the project's obfuscation rules configuration file in order to avoid obfuscation of parts of the SDK that cannot be obfuscated.
-keep class com.finogeeks.** {*;}3.SDK initialisation
We strongly recommend that the SDK is initialised in Application.The parameters to be passed in to initialise the SDK are as follows (sdk initialisation should only be called once and repeated calls should be avoided).
3.1 Configuration information for the applet framework
Prior to version 2.13.102, the SDK only supported the configuration of one server message and could only open applets in a single environment.The configuration parameters were as follows.
FinAppConfig config = new FinAppConfig.Builder()
 .setSdkKey("SDK Key information") // SDK Key
 .setSdkSecret("SDK Secret information") // SDK Secret
 .setApiUrl("server address") // server address
 .setApiPrefix("/api/v1/mop/") // Server interface request routing prefix
 .setEncryptionType("encryptionType") // encryptionType, national:SM, md5: MD5 (recommended)
 .build();
From version 2.13.102 onwards it is possible to configure multiple server information to open applets in different environments at the same time.The configuration parameters are as follows.
// Collection of server information
List< FinStoreConfig> storeConfigs = new ArrayList<>();
// Information on Server 1
FinStoreConfig storeConfig1 = new FinStoreConfig(
 "SDK Key Information", // SDK Key
 "SDK Secret information", // SDK Secret
 "Address of server 1", // Server address
 "Server 1's data upload server address", // the address of the data upload server
 "/api/v1/mop/", // Server interface request routing prefix
 "",
 "encryption method" // encryption method, cc:SM, md5: MD5 (recommended)
);
storeConfigs.add(storeConfig1);
// Information on Server 2
FinStoreConfig storeConfig2 = new FinStoreConfig(
 "SDK Key Information", // SDK Key
 "SDK Secret information", // SDK Secret
 "Address of server 2", // Server address
 "Server 2's data upload server address", // the address of the data upload server
 "/api/v1/mop/", // Server interface request routing prefix
 "",
 "encryption method" // encryption method, cc:SM, md5: MD5 (recommended)
);
storeConfigs.add(storeConfig2);
FinAppConfig config = new FinAppConfig.Builder()
 .setFinStoreConfigs(storeConfigs) // A collection of server information
 .build();
3.2 Setting the SDK initialisation status callback
Implementation of the FinCallback interface for listening to the initialisation state of the SDK.
// SDK initialization result callback for receiving SDK initialization status
FinCallback< Object> callback = new FinCallback< Object>() {
 @Override
 public void onSuccess(Object result) {
 // SDK initialisation successful
 }
 @Override
 public void onError(int code, String error) {
 // SDK initialization failed
 Toast.makeText(AppletApplication.this, "SDK initialization failed", Toast.LENGTH_SHORT).show();
 }
 @Override
 public void onProgress(int status, String error) {
 }
};
3.3 Initialising the SDK
Initialise the SDK by calling the initialisation interface.
FinAppClient.INSTANCE.init(this, config, callback);3.4 SDK initialisation for multi-process processing
The SDK is implemented using a multi-process mechanism where each applet runs in a separate process, i.e.one applet corresponds to one process.When initialising the SDK, one point to note in particular is that the applet process does not need to perform any initialisation operations when it is created, even if the applet SDK is initialised, it does not need to be executed in the applet process. For example, if the application uses some third-party libraries that need to be initialized when the application starts, then when the initialization is performed in Application, only the current process needs to initialize these third-party libraries if it is the host process, the applet process does not need to initialize these libraries. Therefore, before initialising the SDK, be sure to determine which process the current process is, and if it is an applet process, do not perform any operations:.
if (FinAppClient.INSTANCE.isFinAppProcess(this)) {
 return;
}
The above is the entire process of initialising the SDK.The complete code is as follows.
package com.example.finogeeks.appletdemo;

import android.os.Process;
import android.support.multidex.MultiDexApplication;
import android.text.TextUtils;
import android.widget.Toast;

import com.example.finogeeks.appletdemo.api.ApiOpenPage;
import com.example.finogeeks.appletdemo.api.ApiOpenPageForResult;
import com.example.finogeeks.appletdemo.api.DrawModule;
import com.example.finogeeks.appletdemo.util.ProcessUtilKt;
import com.finogeeks.lib.applet.client.FinAppClient;
import com.finogeeks.lib.applet.client.FinAppConfig;
import com.finogeeks.lib.applet.interfaces.FinCallback;

/**
 * Application of {@link android.app.}
 */
public class AppletApplication extends MultiDexApplication {

 @Override
 public void onCreate() {
 super.onCreate();
 if (FinAppClient.INSTANCE.isFinAppProcess(this)) {
 // The applet process does not perform any initialization operations
 return;
 }

 // Collection of server information
 List< FinStoreConfig> storeConfigs = new ArrayList<>();
 // Information on Server 1
 FinStoreConfig storeConfig1 = new FinStoreConfig(
 "SDK Key Information", // SDK Key
 "SDK Secret information", // SDK Secret
 "Address of server 1", // Server address
 "Server 1's data upload server address", // the address of the data upload server
 "/api/v1/mop/", // Server interface request routing prefix
 "",
 "encryption method" // encryption method, cc:SM, md5: MD5 (recommended)
 );
 storeConfigs.add(storeConfig1);
 // Information on Server 2
 FinStoreConfig storeConfig2 = new FinStoreConfig(
 "SDK Key Information", // SDK Key
 "SDK Secret information", // SDK Secret
 "Address of server 2", // Server address
 "Server 2's data upload server address", // the address of the data upload server
 "/api/v1/mop/", // Server interface request routing prefix
 "",
 "encryption method" // encryption method, cc:SM, md5: MD5 (recommended)
 );
 storeConfigs.add(storeConfig2);
 FinAppConfig config = new FinAppConfig.Builder()
 .setFinStoreConfigs(storeConfigs) // A collection of server information
 .build();
 FinAppClient.INSTANCE.init(this, config, new FinCallback<
Object>() {
 @Override
 public void onSuccess(Object result) {
 }
 @Override
 public void onError(int code, String error) {
 Toast.makeText(AppletApplication.this, "SDK initialization failed", Toast.LENGTH_SHORT).show();
 }
 @Override
 public void onProgress(int status, String error) {
 }
 });
 }
}
4.Examples of SDK usage
4.1 Launching the applet
Once the applet is up in the platform, we can open the applet by calling the interface to launch the applet in the SDK.The code to launch the applet is as follows.
FinAppClient.INSTANCE.getAppletApiManager().startApplet(this, "5e0dc1f574193e00010d73c1");If the applet needs to be launched with start-up parameters, an interface that supports passing start-up parameters can be called, as follows.
Map< String, String> params = new HashMap<>();
// path is the path to the applet page
params.put("path", "/pages/index/index");
// query is the start parameter, with the content
"key1=value1&key2=value2 ..." in the form of
params.put("query", "aaa=test&bbb=123");
FinAppClient.INSTANCE.getAppletApiManager().startApplet(this,
"5e0dc1f574193e00010d73c1", params);
4.2 Customizing the applet interface
Implementing an applet custom interface requires creating a class that inherits from AbsApi and overriding the parent's methods (most notably the apis() method and the invoke() method) in the created subclass. The following is an example of how to implement and register an applet customisation interface by opening a native page inside the applet. 1.first, create the ApiOpenPage class, inheriting from AbsApi. 2.Then, the apis() method is overridden in ApiOpenPage to return the names of all the APIs that can be called.We can add multiple API names to the array returned by apis(), the current example adds only one openPage. 3.Finally, the invoke() method is overridden in ApiOpenPage to implement the corresponding logic.The current example implements a simple page jump, i.e.if the openPage interface is called in the applet, then an Activity will be launched on the native side.
package com.example.finogeeks.appletdemo.api;

import android.content.Context;
import android.content.Intent;
import android.text.TextUtils;

import com.example.finogeeks.appletdemo.SecondActivity;
import com.finogeeks.lib.applet.api.AbsApi;
import com.finogeeks.lib.applet.interfaces.ICallback;

import org.json.JSONObject;

/**
 * Custom applet interface for simple page jumps
 */
public class ApiOpenPage extends AbsApi {

 private Context mContext;

 public ApiOpenPage(Context context) {
 mContext = context;
 }

 /**
 * Returns an array of callable api names
 *
 * @return an array of callable api names
 */
 @Override
 public String[] apis() {
 return new String[]{"openPage"};
 }
 /**
 * This method is triggered when the corresponding API call is received, and the business logic of the API is implemented in this method
 *
 * @param event event name, i.e.API name
 * @param param event parameter
 * @param callback Callback interface, used to call back the result
to the applet after executing the business logic
 */
 @Override
 public void invoke(String event, JSONObject param, ICallback
callback) {
 if ("openPage".equals(event)) {
 String url = param.optString("url");
 if (! TextUtils.isEmpty(url)) {
 Intent intent = new Intent();
 intent.setClass(mContext, SecondActivity.class);
 mContext.startActivity(intent);
 callback.onSuccess(null);
 } else {
 callback.onFail();
 }
 }
 }
}
After implementing the custom applet interface, two more steps** are required before the interface can be called in the applet. 1.Register the custom applet interface to the SDK.Interface registration is achieved by calling the registerApi method of the IExtensionApiManager interface.
FinAppClient.INSTANCE.getExtensionApiManager().registerApi(new
ApiOpenPage(context));
2.Add a custom interface configuration to the applet project.Create a PhizClipConf.js file in the root directory of the applet project and configure the corresponding custom interface in PhizClipConf.js with the following configuration.
module.exports = {
 extApi:[
 {
 name: 'openPage', // extension interface name
 params: { // extend the interface parameters, you can list only the required parameters
 url: ''
 }
 }
 ]
}
4.3 Interacting between native and applet pages
When the applet loads a web page, if the web page is to call native functionality, the native code needs to be registered inside the SDK in the form of a custom JSSDK interface.The custom JSSDK interface is implemented in the same way as the custom applet interface, i.e.it inherits from AbsApi and overrides the parent class methods. The difference is that the registerApi method of the IExtensionWebApiManager is called when the interface is registered, instead of the method in the IExtensionApiManager.
FinAppClient.INSTANCE.getExtensionWebApiManager().registerApi(new
WebApi(context));
The SDK also supports native calls to the JavaScript code in the web page in the following way.
FinAppClient.INSTANCE.getAppletApiManager().callJS("appId",
"funcName", "funParams", 1)
 .subscribeOn(Schedulers.io())
 .observeOn(AndroidSchedulers.mainThread())
 .subscribe(
 result -> Toast.makeText(context, "callJS
successfully : " + result, Toast.LENGTH_SHORT).show(),
 throwable -> Toast.makeText(context, "callJS failed :
" + throwable.getLocalizedMessage(), Toast.LENGTH_SHORT).show()
 );
5.Extended SDK
The above is all based around the core SDK finapplet.In fact, in addition to the core SDK, we also provide an extension SDK, which is a library that relies on the core SDK and provides various applet APIs that are not available in the core SDK. The reason for providing an extension SDK is to ensure that the core SDK is light enough and the applet API is rich enough.The core SDK is responsible for setting up the basic framework for running the app and providing a small number of the most inaccessible APIs, while retaining only basic permissions such as storage, camera, geolocation, etc., and is only a little over 1MB in size.
Get the extended SDK
You can download the Android SDK file at the Resource Download Centre.The extended SDK is also included in the downloaded zip file.
If you wish to use the API in the extension SDK, you can rely on the extension SDK library in gradle at
implementation 'com.finogeeks.mop:plugins:x.y.z' //x.y.z must be replaced with the specific version number6.MapSDK
The MapSDK supports the Map component and the Location API. It relies on the core SDK as a complement to the Map and Location functions. The map and location capabilities provided depend on a third-party map and location SDK, which supports the use of three combinations of Gode Map|Gode Location, Baidu Map|Baidu Location and Google Map|Google Location.
Note
Please see "Development-API-Location" for the location API support of the Gaode, Baidu and Google solutions.
6.1 Integration
1.Dependency on MapSDK library in gradle.
implementation 'com.finogeeks.mop:map:x.y.z' //x.y.z must be replaced with the specific version number2.Since the map and location capability implemented by MapSDK depends on the third-party map and location SDK, the host APP is also required to integrate the third-party map and location SDK and complete API_KEY, Service registration, etc.
Note
Please select one of the following third party SDK providers for integration.
For detailed integration instructions for third party SDKs, please refer to the official third party SDK integration documentation.
Reliance on third party SDK libraries: (please select one)
//Gaudet
implementation 'com.amap.api:3dmap:8.0.0' // you can replace it with the version number you need
implementation 'com.amap.api:location:5.5.1' // you can replace it with the version number you need
implementation 'com.amap.api:search:7.9.0' // you can replace it with the version number you need// Baidu
implementation 'com.baidu.lbsyun:BaiduMapSDK_Map:7.4.0' // you can replace it with the version number you need
implementation 'com.baidu.lbsyun:BaiduMapSDK_Location:9.1.8' // you can replace it with the version number you need
implementation 'com.baidu.lbsyun:BaiduMapSDK_Search:7.4.0' // you can replace it with the version number you need/Google
implementation 'com.google.android.gms:play-services-maps:16.1.0' //
this version is recommended and can be replaced with the version number
you need, but it is not supported above this version
implementation 'com.google.android.gms:play-services-location:16.0.0'
// this version is recommended and can be replaced with the version number you need, but it is not supported above this versionRegister the API_KEY and Service of the third party SDK in AndroidManifest.xml: (choose one depending on the third party SDK you depend on)
//Gaudet
< meta-data
 android:name="com.amap.api.v2.apikey"
 android:value="The ApiKey you requested" />
< service android:name="com.amap.api.location.APSService" />// Baidu
< meta-data
android:name="com.baidu.lbsapi.API_KEY"
android:value="The ApiKey you requested" />
< service
android:name="com.baidu.location.f"
android:enabled="true"
android:process=":remote" />/Google
< meta-data
android:name="com.google.android.geo.API_KEY"
android:value="The ApiKey you requested" />Configure the SO library architecture supported by the third party SDK in build.gradle.
android {
 defaultConfig {
 ndk {
 //Set the supported SO library architecture (you can select one or more platforms of so as required)
 abiFilters "armeabi", "armeabi-v7a", "arm64-v8a", "x86",
"x86_64"
 }
 }
}
7.Bluetooth SDK
Using the Bluetooth interface requires a separate integration of the Bluetooth SDK, once integrated the interface will take effect and no configuration is required. Integration method.
implementation 'com.finogeeks.mop:bluetooth:x.y.z'8.SoundNet SDK
The use of the SoundNet related interfaces requires a separate integration of the SoundNet SDK, which will take effect once the interfaces are integrated and no configuration is required. Integration method.
implementation 'com.finogeeks.mop:agora:x.y.z'If you use the aar import to access the SoundNet SDK, you will need to add an additional SoundNet dependency.
implementation 'io.agora.rtc:full-sdk:3.5.0'9.WebRTCSDK
Using WebRTC-related interfaces requires a separate WebRTCSDK integration, which takes effect once the interface is integrated and requires no configuration. Integration method.
implementation 'com.finogeeks.mop:webrtc:x.y.z'If you are using the import aar to access the WebRTCSDK, you will need to add additional WebRTC dependencies.
implementation 'org.webrtc:google-webrtc:1.0.32006'10.Contact SDK
The use of contact-related interfaces requires a separate integration of the contact SDK, which takes effect once the interface is integrated and requires no configuration. Integration method.
implementation 'com.finogeeks.mop:contact:x.y.z'11.Clipboard SDK
Using the clipboard-related interfaces requires a separate integration of the clipboard SDK, which takes effect once the interface is integrated and requires no configuration. Integration method.
implementation 'com.finogeeks.mop:clipboard:x.y.z'12.PhizSDK
Quick access to the Phiz SDK provides the ability to call up Phiz to get login, user information, mobile phone number and payment via the Phizclip. Integration method.
implementation 'com.finogeeks.mop:wechat:x.y.z'and add the Phiz App ID you applied for in the Phiz Open Platform to the build.gradle file of your project (e.g.app/build.gradle) at
android {
 // ...Other configurations omitted
 defaultConfig {
 // ...Other configurations omitted
 resValue "string", "phiz_sdk_app_id", "Your Phiz SDKAPPID"
 }
}
Note
To use the PhizSDK you must ensure that the core SDK version is 2.37.13 or above.
Note
As the PhizSDK needs to override the open-type related methods in the IAppletHandler, specifically chooseAvatar, contact, feedback, getPhoneNumber, launchApp, shareAppMessage. So if you have implemented IAppletHandler and have implemented the above six methods, PhizSDK will take over getPhoneNumber and the remaining five methods will be migrated as follows, if you have not implemented IAppletHandler or do not use the above six methods, you can ignore this. 1.Implement the IWeChatOpenTypeHandler interface.
class MyWeChatAppletOpenTypeHandler : IWeChatOpenTypeHandler {
override fun chooseAvatar(callback:
IAppletHandler.IAppletCallback) {
// The logic of your implementation
}

override fun contact(json: JSONObject): Boolean {
// The logic of your implementation
}

override fun feedback(bundle: Bundle): Boolean {
// The logic of your implementation
}

override fun launchApp(appParameter: String?): Boolean {
// The logic of your implementation
}

override fun shareAppMessage(
appInfo: String,
bitmap: Bitmap?
callback: IAppletHandler.
) {
// The logic of your implementation
}
}
2.After the core SDK has been successfully initialised, set up your implementation class.(Note that, as with the core SDK, it is important to ensure that it is set up in the main process).
WeChatOpenTypeClient.instance.iWeChatOpenTypeHandler =
MyWeChatAppletOpenTypeHandler()